
In Spring 2017, we released our first O'Reilly book, Learning React. On the day that I heard they were sending the final version of the book to the printer, I made one simple request on Twitter:
This is being sent to the printer this week! React and related library maintainers: please don't change anything for 5-ish years. Deal? 😀😎 https://t.co/njHdsKv6bf
— Eve Porcello (@eveporcello) April 24, 2017
I thought this was very reasonable. Don't change anything for 5 years. Well, two years later a lot has changed, and to be fair, I was warned:
but if we don't you won't have an excuse to write a second edition! 🙃
— Sophie Alpert (@sophiebits) April 27, 2017
Clearly, no one listened to my tweet but for good reason. As React evolves, it continues to get better. We can leverage the new benefits by incorporating new patterns into our existing applications. In the first edition of the book, we built an app called the Color Organizer. It's an app that allows people to add, edit, and delete from their list of favorite colors. A key feature of the app was ratings where people could select a star rating for each color.
Let's take a look at the Color Organizer as it was in the first edition, and then we'll upgrade it to use the latest syntax for the second edition of the book that will come out later this year. (And yes, that is a nonchalant announcement that we are working on a 2nd edition of Learning React, which will contain a fresh update of all of the content. It's going to be awesome.)
The UI for the Color Organizer looks like this:
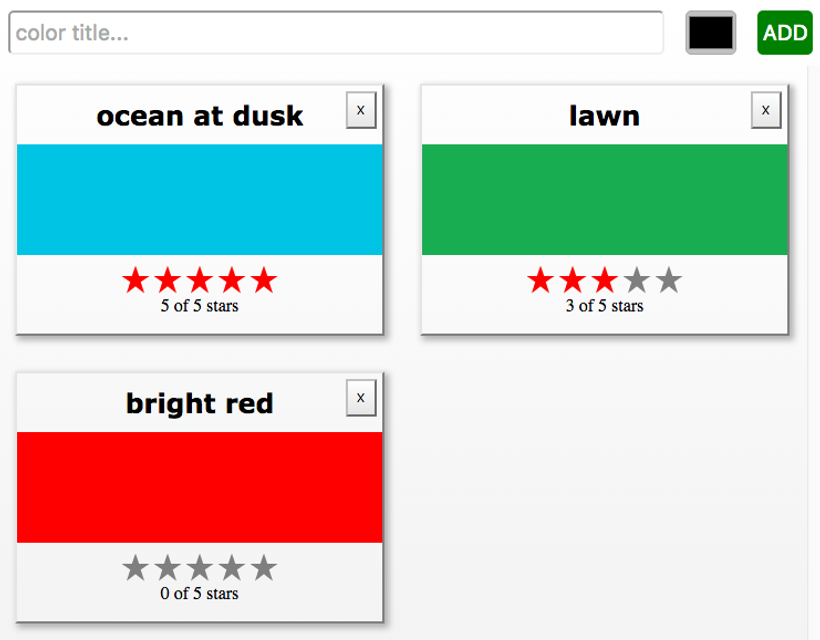
There are several components at work here, but let's focus on the <StarRating /> component:

The rating is made up of 2 components: the <StarRating /> and the <Star />. We need a way to track whether the star is selected to determine the rating. We also need to allow users to click on a star to apply a specific rating. Finally, we want to assign a value for a total number of stars so that this component could be used in apps where there was a 4 star rating, 5 star rating, 10 star rating, etc.
In the book, we used a class component for the StarRating and a function component for the Star. The Star looked like this:
const Star = ({ selected = false, onClick = f => f }) => (
  <div className={selected ? 'star selected' : 'star'} onClick={onClick} />
);
The Star has two properties: selected and onClick. If selected is false, it will have a className of star meaning that it will be gray instead of red. When clicked, the onClick method is invoked.
Next, let's look at the StarRating. This component will render the number of Star components from the totalStars property. When clicked, each Star will trigger the change method which will set the state of starsSelected. As is typical of class components, we need to handle setup in the constructor: setting an initial state and then binding this for the change event.
class StarRating extends React.Component {
  constructor(props) {
    super(props);
    this.state = {
      starsSelected: 0
    };
    this.change = this.change.bind(this);
  }

  change(starsSelected) {
    this.setState({ starsSelected });
  }

  render() {
    const { totalStars } = this.props;
    const { starsSelected } = this.state;
    return (
      <div className="star-rating">
        {[...Array(totalStars)].map((n, i) => (
          <Star
            key={i}
            selected={i < starsSelected}
            onClick={() => this.change(i + 1)}
          />
        ))}
        <p>
          {starsSelected} of {totalStars} stars
        </p>
      </div>
    );
  }
}

render(
  <StarRating totalStars={5} />,
  document.getElementById('react-container')
);
You can also check this out on CodeSandbox: